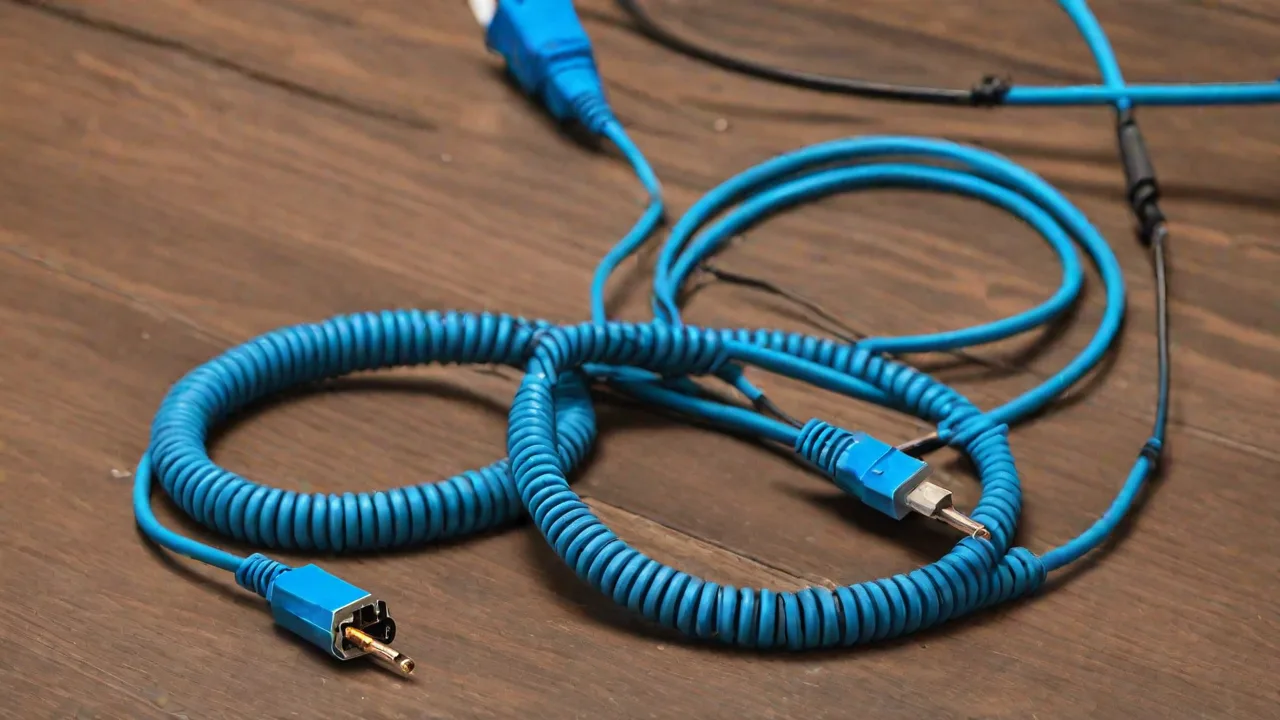
How to Safely Disconnect and Reconnect Ts Cables During Live Performances
How to Safely Disconnect and Reconnect TS Cables During Live Performances
Performing live music or sound engineering often requires disconnecting and reconnecting TS (Tip-Sleeve) cables, sometimes under the pressure of a running set. Whether you’re swapping guitars mid-song, replacing a faulty patch cable on a pedalboard, or rerouting signal paths between songs, doing it incorrectly can lead to equipment damage, loud pops that disturb the audience, or even electrical hazards. Understanding the proper procedures for handling TS cables during live performances is essential for every sound technician and musician. This article covers the fundamentals of TS cables, the risks involved, step-by-step safe disconnection and reconnection methods, maintenance best practices, troubleshooting tips, and advanced techniques to keep your show running smoothly.
Understanding TS Cables and Their Role in Live Sound
TS cables are unbalanced audio cables with two conductors: a tip (signal) and a sleeve (ground). They are the standard connection for electric guitars, basses, and many other instruments that output an unbalanced signal. Unlike TRS (Tip-Ring-Sleeve) cables, which carry balanced signals or stereo audio, TS cables are more susceptible to noise and interference over long distances due to their lack of a dedicated shield return. In live performance settings, they are typically used for short patch cable runs—from guitar to pedalboard, pedalboard to amplifier, or from a direct box to a mixer. Their simplicity and reliability make them ubiquitous, but that same simplicity demands careful handling to avoid ground loops, shorts, and physical damage to jacks.
TS vs. TRS: Why It Matters
Using the wrong cable type (TRS where TS is intended) can cause phase cancellation or even damage to equipment that relies on a ground reference for its signal path. Conversely, plugging a TS cable into a balanced TRS input (such as a mixer channel) often works but loses the benefit of noise rejection. For pure instrument connections, TS remains the go-to, and knowing when to use which connector prevents signal issues on stage. Always check your gear’s manual—some active instruments and effect units explicitly require a TS connection to close a battery circuit or to maintain a proper ground reference.
Anatomy of a TS Cable: What You Need to Know
A standard TS cable consists of a central signal conductor (the tip), an outer shield (the sleeve), and insulation layers. The shield also serves as the ground return path, which is why unbalanced cables are more prone to picking up hum and radio interference. In live sound environments, the cable jacket is typically PVC or rubber; rubber offers higher flexibility and durability but can be more prone to tangling. Connectors are available in straight and right-angle versions. Right-angle plugs are common on pedalboards to reduce strain and save space, but they can be harder to grip for a quick disconnect. Choose connectors that offer good strain relief and a positive locking feel.
Why Safe Handling Matters During Live Performances
During a live show, every second counts. Cables are tangled, stage lighting creates trip hazards, and musicians are often in motion. Disconnecting a TS cable without proper precautions can produce a loud, sudden pop that stresses loudspeaker drivers, annoys the audience, and may even damage amplifier output stages if the cable is disconnected while the channel is hot. Additionally, if the plug is yanked out by the cable rather than the connector, the solder joints inside the plug can fracture, creating intermittent shorts that cause crackling or total signal loss mid-song. Electrical risks, while less common with TS cables (since they don't carry phantom power like XLRs), still exist in high-power setups where cable shields contact live chassis or other voltage sources. Developing a safe routine protects both gear and people.
Risks of Hot-Patching TS Cables
Hot-patching (disconnecting or reconnecting a cable while the signal path is live) is tempting during a fast change, but it is risky. When the tip of a TS plug leaves the jack, the amplifier sees a sudden open circuit, which can cause oscillation or a DC offset that stresses the amplifier’s output stage. Some modern gear includes muting circuits that prevent pops, but relying on that is unsafe. The safest practice is always to mute or power down before touching any TS connection. Even a momentary connection break can cause a transient that propagates through the entire sound system. For tube amplifiers, an open input can lead to excessive voltage on the grid, shortening tube life or causing microphonic ringing.
Additional hazards: If you are using wireless systems, the TS cable from the receiver to the amplifier carries a signal that can still cause pops. Additionally, when using effect pedals with true bypass switching, unplugging the input cable while the pedal is on can create a ground loop hum that lasts until the pedal is bypassed or reconnected.
Pre-Performance Preparation
Preparation is the key to smooth cable changes during a show. Before the first downbeat, take these steps to ensure every TS cable in your rig is ready for disconnection and reconnection without incident.
Inspect and Test All Cables
- Visually examine each cable for cuts, kinks, or frayed insulation near the connectors. Pay special attention to the area where the cable enters the plug—bending here is the most common failure point.
- Gently wiggle the plug while the cable is plugged into a known working device to check for intermittent noise. Do this at both ends of the cable.
- Use a cable tester to confirm continuity between tip, sleeve, and shield. Any shorts or opens must be repaired before show time. A simple multimeter can also work: check resistance between tip and sleeve—should be infinite (open circuit) when nothing is plugged; when a cable is plugged, the other end should show zero ohms between tip and tip, and sleeve and sleeve.
- Label both ends of each TS cable with tape and a permanent marker to identify signal paths (e.g., “Guitar 1 – Amp 1”). This prevents confusion during fast swaps. Use color-coded tape or heat-shrink rings for quick visual identification.
Optimize Cable Routing and Strain Relief
- Route cables away from power cables, foot traffic, and sharp edges. Use cable ramps or tape down loose runs. Keep instrument cables at least 12 inches away from AC power cables to reduce hum induction.
- Leave enough slack at each connection point so that a musician can move without pulling the plug out. A good rule is about 18 inches of service loop at each end.
- Secure cables to pedalboards or rack rails with zip ties or Velcro strips, leaving the connector end free to unplug easily. Use adhesive cable anchors to keep cables tidy without constricting movement.
- For floor-based gear (pedals, DI boxes), consider using right-angle plugs to minimize stress when the cable is stepped on or pulled.
Set Volume and Power States
- Establish a standard mute procedure: before any change, turn your instrument volume knob all the way down or engage a mute footswitch. For guitars with a volume knob, roll it off completely—even a small residual signal can cause a pop if the cable is pulled.
- If possible, have a dedicated mute switch or A/B box on stage to kill the signal instantly. This is especially helpful for wireless packs that still use a TS connection to the guitar.
- For amplifier changes, always set the amp to standby or turn off the main power switch before disconnecting or reconnecting a TS cable. Standby idles the high voltage while keeping the tubes warm; it is preferred for short breaks because it avoids thermal cycling.
- Mixer operators: mute the channel strips that correspond to TS inputs before any cable change. Even if the stage volume is low, a pop can travel through the mains and monitors.
Step-by-Step Safe Disconnection Procedure
When it’s time to remove a TS cable during a live performance, follow these steps in order. Adjust based on whether you have time to power down or must rely on muting.
Method 1: Full Power Down (Best Practice)
- Mute or turn down the channel on the mixer or the instrument volume to zero.
- Power off the amplifier or the device receiving the signal. Wait a few seconds for capacitances to discharge—typically 5-10 seconds is sufficient for most amps.
- Grip the TS plug firmly by its metal or plastic barrel—never pull on the cable. Use your thumb and forefinger to hold the connector, not the wire.
- Pull the plug straight out of the jack. Do not wiggle side to side, as that can bend the plug or damage the jack’s contact fingers inside.
- If the plug resists, inspect the jack for foreign objects or corrosion. Never force it; a stuck plug may need gentle rocking with a tool (if you have experience) or replacement of the jack. Try a small amount of contact cleaner or isopropyl alcohol on a cotton swab around the plug barrel.
- Coil the disconnected cable loosely over your arm or place it on a designated cable mat to avoid tripping hazards. If you must set it down, tape the connector to the floor near your patch bay.
Method 2: Mute-Only Disconnection (Fast Change)
In some live scenarios, powering down is impractical—for example, when switching guitars in a continuous set while keeping the amplifier idling. In such cases:
- Turn the instrument’s volume knob completely off or press a mute switch on a pedal or wireless unit.
- Wait for any latency from analog circuitry (about one second) to ensure the signal is completely silenced. If using a digital multi-effects unit, wait two seconds to account for DSP buffering.
- Grip the plug as described above and pull straight out.
- Immediately plug the new cable into the same input jack. The brief moment with no cable in the jack is fine, as the amplifier input is normally loaded with a high impedance and will not produce a pop if the mute was active.
- Turn the instrument volume back up gradually to confirm signal flow. Listen for any hum or hiss; if present, check the ground connection or reseat the plug.
Method 3: Using a Signal Switcher or A/B Box
For the smoothest transitions, invest in an A/B box or a dedicated signal switcher. These devices allow you to route the instrument signal to one of two outputs (or mute both). To disconnect a TS cable from the active output:
- Switch the A/B box to the “B” position (which may be a dummy load or the other amp). Some boxes have a mute position that shorts the input to ground.
- Now you can safely disconnect the cable from the “A” output or the amplifier without any signal interruption.
- Reconnect the new cable to “A,” then switch back.
This method is ideal for guitarists who switch between multiple amplifiers or pedalboard setups mid-set.
Safe Reconnection During a Live Performance
Reconnecting a TS cable carries the same risks as disconnection: a loud pop or short. The process mirrors the disconnection steps, with extra care for alignment.
Preparation Before Plugging In
- Ensure the destination device (amp, pedal, mixer) is either powered off or muted. If using the mute-only method, confirm the channel mute is on.
- Inspect the plug and the jack for debris. A quick puff of compressed air or a clean cloth can remove dust that causes crackling. For jacks, use a small brush or a pipe cleaner slightly moistened with contact cleaner.
- Rotate the plug so that the tip is oriented toward the jack’s opening, aligning the keyways if present (some jacks have a notch for the plug’s sleeve).
Step-by-Step Reconnection
- Hold the TS plug by its connector body.
- Insert the tip into the jack opening at a slight angle (less than 5 degrees) to avoid bending the tip against the side of the jack.
- Push the plug straight in with a smooth, steady pressure until you feel a firm click or the plug seats fully. Do not twist or force beyond the click—that indicates the plug is home.
- Give a gentle tug to verify it is locked in place. A loose connection can cause intermittent dropouts during performance. If the plug feels loose, check that the jack’s contact fingers are not bent.
- Slowly bring the audio signal back up: turn the instrument volume on or unmute the channel gradually while monitoring for hum or buzz. If you hear a loud hum, a ground loop exists; check for reversed polarity or use a ground lift switch on a DI box. If hum disappears when you touch the strings, you likely have a grounding issue in the instrument itself.
Reconnection with Active Electronics
Many electric guitars and basses have active preamps that require a TS cable to close the battery circuit. When unplugging these instruments, the battery disconnects. Upon reconnection, the battery powers up again. To avoid a thump from the preamp being suddenly active, always mute the signal path before reconnecting. Some active instruments have a dedicated mute switch; use it. If your active instrument doesn’t have a mute, turn the volume knob all the way down before plugging in. Also, consider that leaving a cable plugged in when the instrument is not in use drains the battery—use a stereo cable that grounds the ring to shut off power if your guitar supports that feature.
Advanced Techniques and Considerations
Once you master the basics, these advanced practices will further protect your equipment and tighten your live workflow.
Using DI Boxes for Isolation
A Direct Injection (DI) box converts your instrument’s unbalanced TS output into a balanced XLR signal, reducing noise and allowing longer cable runs. When you disconnect the TS cable on the instrument side, the DI box continues to supply a balanced signal to the mixer, preventing pops if the mixer channel is left open. Always mute the mixer channel before unplugging the TS input of the DI. Additionally, some DI boxes have a ground lift switch and a pad; use the pad if the input signal is too hot, and the ground lift if you hear hum after connecting.
Emergency Cable Swap in Mid-Song
Sometimes a cable fails during a performance. If you must swap a TS cable while a musician is playing:
- Have a second instrument or a backup cable pre-connected to an A/B switch. The guitarist switches to the B channel (which goes to the backup cable), then you can safely unplug the faulty cable from the A channel.
- If no A/B switch is available, use a volume pedal or mute pedal. Step on the mute, disconnect the cable, reconnect the backup, then release the mute.
- Practice the motion to take less than two seconds—speed with safety is achieved through repetition. Have the backup cable already plugged into the amp and taped down near the switching point.
- If you must swap a cable on a pedalboard where the pedal is in the middle of a chain, it may be faster to bypass the entire affected pedal or use a loop switcher.
Coiling Cables Properly for Reliability
Improper coiling (wrapping around the elbow or twisting) can cause internal wire breakage over time. Use the over-under technique: alternately twist the cable half a turn between loops. This prevents kinks and twists that stress the TS plug’s solder joints. Never wrap the cable tightly around the guitar strap or stand—always store loops loosely. For fast stage changes, consider using reel-on or reel-off cable drums that allow quick deployment without tangling.
Managing Multiple Cable Changes in Quick Succession
During festivals or changeovers, you may need to swap multiple TS cables between different instruments and amps. Create a cable map: label every cable with its start and end point. Use a “cable parking” system—have pre-coiled cables hanging on hooks or in labeled bins at the side of the stage. Assign one person to manage cable changes while others handle the instruments. Use color-coded cables or heat-shrink bands to quickly identify signal paths (e.g., red for guitar 1, blue for bass).
Troubleshooting Common TS Cable Issues During Live Performance
Even with careful handling, problems arise. Here are solutions to the most common issues encountered when disconnecting or reconnecting TS cables on stage.
Loud Pop or Crackle After Reconnection
If you hear a pop or crackle once the cable is reinserted, it could be due to:
- Dust or debris on the contact surfaces—clean the plug and jack with contact cleaner.
- A cold solder joint inside the plug—replace or resolder the connector.
- A faulty jack that has loose spring contacts—either replace the jack or use a different input.
- The cable was not fully inserted—push it in until you feel a definite click.
Intermittent Signal Cutting Out
If the signal comes and goes when you move the cable or when you disconnect/reconnect:
- Check the strain relief at the plug; if the cable jacket is pulling away from the plug, the wires inside may be breaking.
- Try a different cable to rule out the instrument or amp jack.
- If the problem occurs only when disconnecting, you may be slightly bending the plug sideways, causing internal fracture of the tip connection. Pull straight out.
Hum or Buzz After Reconnection
Hum typically indicates a ground loop or a broken ground shield:
- Check if the ground lift switch on a DI box or amplifier is engaged; try both positions.
- Ensure the TS cable’s sleeve (ground) is making good contact—sometimes a bent sleeve can fail to connect.
- Move the cable away from power cables and transformers.
- If using multiple amplifiers, use a hum eliminator or a ground-lifting DI box.
Plug Feels Loose or Falls Out
If the plug doesn’t stay in the jack:
- The jack’s contact fingers may be worn or bent outward. You can carefully bend them back inward with a small flathead screwdriver (disconnect power first).
- Some cheap plugs have a slightly smaller diameter—replace with a quality neutrik or switchcraft connector.
- For right-angle plugs, the body might prevent full insertion if the cable is routed near the jack. Try a straight plug or reposition the pedal.
Maintaining Your TS Cables for Longevity
A well-maintained cable is less likely to fail mid-show and more likely to connect and disconnect smoothly.
Regular Inspection
- After every show, wipe down connectors with a cloth and isopropyl alcohol to remove skin oils and dirt that cause oxidation.
- Check for bent or dented plug barrels. Light bending can be repaired with pliers, but if the metal cracks, replace the plug.
- Listen for intermittent crackles when you wiggle the cable. That indicates a failing solder joint—resoldering is a simple fix with a small investment in tools.
- Inspect the cable jacket for cuts or abrasions; repair with heat shrink or electrical tape as a temporary measure, but replace the cable permanently.
Soldering Repairs
If you are comfortable with a soldering iron, you can extend a cable’s life by re-soldering the plug. Use a quality 60/40 tin-lead or lead-free solder, and ensure the tip and sleeve connections do not touch. Add heat shrink tubing to prevent short circuits. For those who prefer not to solder, replace the cable entirely—damaged cables are not worth the risk on stage. Keep a few spare plugs and a soldering iron in your tool kit for emergency repairs.
Storage Practices
- Use cable ties or Velcro wraps to keep loops organized, but avoid overtightening as it can dent the cable.
- Store cables in a dry, cool case, away from direct sunlight and moisture. Humidity accelerates oxidation of connectors.
- Label the length on each cable to quickly grab the right one for a short or long run.
- Never store cables with the plug inserted into the cable’s own loop or into another cable’s connector—this can bend the plug barrel.
Common Mistakes and How to Avoid Them
Even experienced technicians and musicians make errors under pressure. Here are the most frequent pitfalls and their remedies.
| Mistake | Consequence | Solution |
|---|---|---|
| Yanking cable by the wire | Damaged solder joint, intermittent short | Always grip the plug barrel |
| Not muting before disconnection | Loud pop, risk to speakers and ears | Mute channel or instrument volume first |
| Forcing plug into jack | Bent plug tip, damaged jack contacts | Align properly, push straight in |
| Using a damaged cable | Noise, signal loss, safety hazard | Regular inspection and immediate replacement |
| Coiling cables incorrectly | Internal wire fatigue and tangles | Use over-under technique |
| Plugging into a live, unmuted channel | Sudden loud sound, feedback risk | Mute mixer channel and amp before plugging |
| Using wrong cable type (TRS in TS jack) | Phase cancellation, no signal, or battery drain | Verify cable type; use TS for unbalanced instruments |
Conclusion: Build a Safe Workflow
Disconnecting and reconnecting TS cables during live performances is a routine but critical skill. By understanding the risks, preparing your gear ahead of time, following a consistent disconnection and reconnection procedure, and maintaining your cables, you can prevent loud pops, protect your equipment, and keep the show running smoothly. Implement these practices into your personal workflow and train any stage techs or band members who handle cables. With repetition, these actions become muscle memory, allowing you to focus on the music and the performance. Safe cable handling is not just about avoiding damage—it’s about respecting the craft of live sound and ensuring every audience experience is uninterrupted.
Additional Resources and External Links
For further reading on TS cables, live sound safety, and equipment care, consult these authoritative sources:
- Sweetwater: TS vs TRS – What’s the Difference?
- Sound On Sound: Cable Care and Repair
- ProSoundWeb: Live Sound Safety Tips
- Audio-Technica: Balanced vs Unbalanced Cables
- Neutrik: Connector FAQ and Maintenance Tips
By implementing these practices, you ensure that disconnecting and reconnecting TS cables during live performances becomes a routine, safe, and reliable part of your stagecraft—protecting your gear and keeping the music front and center.